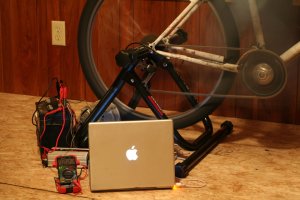
Ever wanted to generate electricity with your bicycle? Maybe even power your laptop computer by riding your bike? That's what I set out to do when I ripped an alternator out of a 1980s Ford Fiesta...
What you're in for:
50+ watts of continual electrical output and a true appreciation for the efficiency of the compact fluorescent light bulb.
What I needed:
- Bike
- Stationary Trainer Stand w/o Resistance Unit
- Alternator w/ Built in Regulator
- Method to Turn alternator w/ Bicycle Wheel
- 12V Inverter
- 12V Battery
- Multimeter
- Small 12V Light
- Misc Wiring & Connections
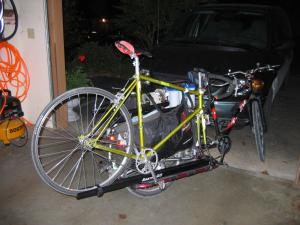
Bike with appropriate rear tire
I have had success using both a mountain bike (26" wheel) and road bikes (700c wheels). The larger 700c wheel provides a slightly better ratio for turning the alternator quickly, but either is sufficient.
A geared bicycle is preferred to a single speed because of how the alternator resists turning. Starting off, the alternator is very difficult to turn; but the faster it spins, the easier it gets to pedal. A low gear is nice for when the alternator is under heavy load, and a high gear is nice for maintaining efficiency as one pedals faster.
If you turn the alternator using the back tire directly (as opposed to using a belt) is important that you use a tire with a smooth tread. Not only does this reduce energy loss to friction, it is also quieter. If you need a tire for this project, check with your local bike shop to see if they can save an old, discarded tire for you. Please do not ride on an old or damaged tire though, as it could easily rupture and cause you serious harm.
Stationary Trainer Stand
Trainers cost a fair amount, but you may have luck finding one with a broken resistance unit. You could also make and use your own stand (something I did for a while), but the stability and easy connection of the trainer stand is nice.
Alternator
A working alternator is something that can be salvaged from a junked vehicle. Make sure it has a built-in voltage regulator, as some use an external regulator. The regulator simply assures that the alternator will output the appropriate, constant charging voltage of around 14 volts no matter how fast it spins. Two/three wires from alternator all go to positive on battery; connect another wire from negative battery post to body of alternator. See http://web.media.mit.edu/~nathan/nepal/ghatta/alternator.html for wiring details.
Attachment Method
Both belt drives and direct drive setups are possible. I am currently using a direct drive setup, where the tire itself turns the alternator, but the key is simply to turn the alternator in a way that minimizes friction, yet will not slip when the alternator becomes difficult to turn.
Inverter
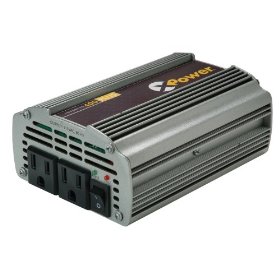
The inverter is used to convert the 12 Volt Direct Current (12VDC) produced by the alternator and stored in the battery into 110-120 Volt Alternating Current (110-120VAC). Modified sine-wave inverters may be less ideal than a pure sine-wave inverter, but at $25-40 USD, cost about 1/10th as much. These inverters are around 85% efficient, so if you have items that run on 12VDC in the first place, skip the inverter and benefit from the efficiency.
Battery
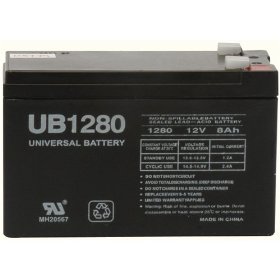
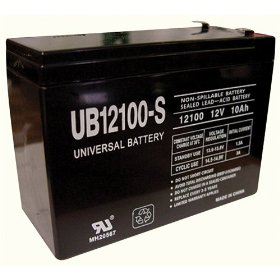
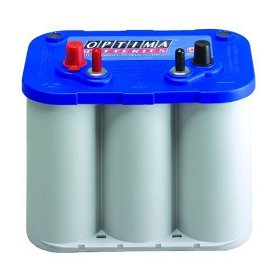
Deep Cycle/Marine 12-Volt batteries are definitely recommended because of their ability to be repeatedly charged and discharged. A typical car battery is designed to provide the energy needed to start a car, not to be fully discharged, and more than a handful of full charge cycles will destroy its ability to hold a charge. There are a number of deep cycle battery technologies, but the one I use is a sealed lead-acid (SLA) (also referred to as Absorbed Glass Mat (AGM)). This battery has a significant upfront cost (much higher than a flooded battery), but unlike a flooded battery, a sealed battery is maintenance free and should not release toxic vapors while charging indoors.
Having learned from my experience with an electric bicycle, I spent significant money on a rugged and long-lasting battery (~$160). The Optima D34M battery I use is 55 Amp-hours or 660 Watt-hours (660Wh = 12V x 55Ah), but to bring down the overall cost, a smaller 8-18Ah battery should suffice. You may even be lucky enough to find one in an old video camera, set of portable speakers, or battery powered leaf-blower.
A starting place for battery information: http://www.solar-electric.com/deep_cycle_batteries/deep_cycle_battery_faq.htm
Multimeter
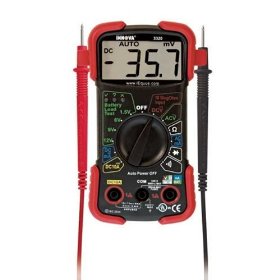
A multimeter is vital and allows you to measure and monitor voltages, current, and assure that your connections are correct. Another option that will allow you to measure 8 things at once is the Watt's Up Meter.
Small 12V Light
The small electrical load and circuit provided by the light both protects the alternator and allows the rider to reach a reasonable cadence before the alternator begins to provide resistance and charge the battery. [More on why] Vehicles have plenty of 12V lights (some with a handy switch), so reclaim one from an old vehicle or visit the auto parts store.
Misc Wiring & Connections
Anything you have laying around may be useful (14 AWG or so). Recently, I have started using Anderson Power pole connectors wherever I can, and a Watt's Up Meter to measure current (amps), voltage, and electrical charge (amp-hours).
Related Links
Circuit Diagram and Component Simulator (Excellent)

